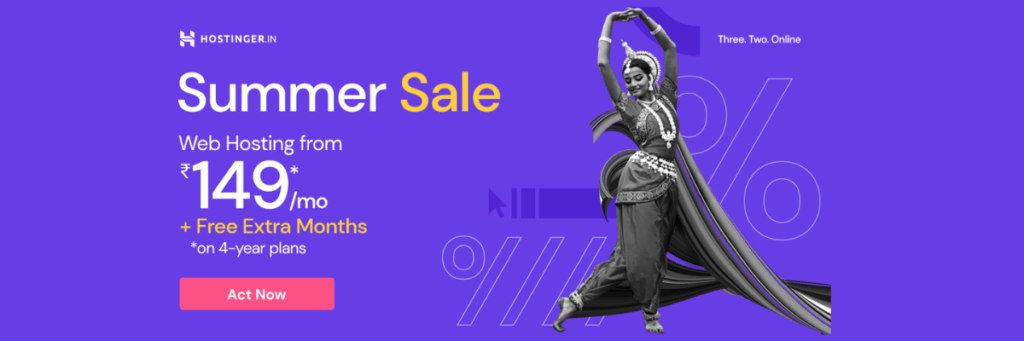
HOSTINGER PLANS START FROM ₹69/Month and Popular Plan is ₹149/Month
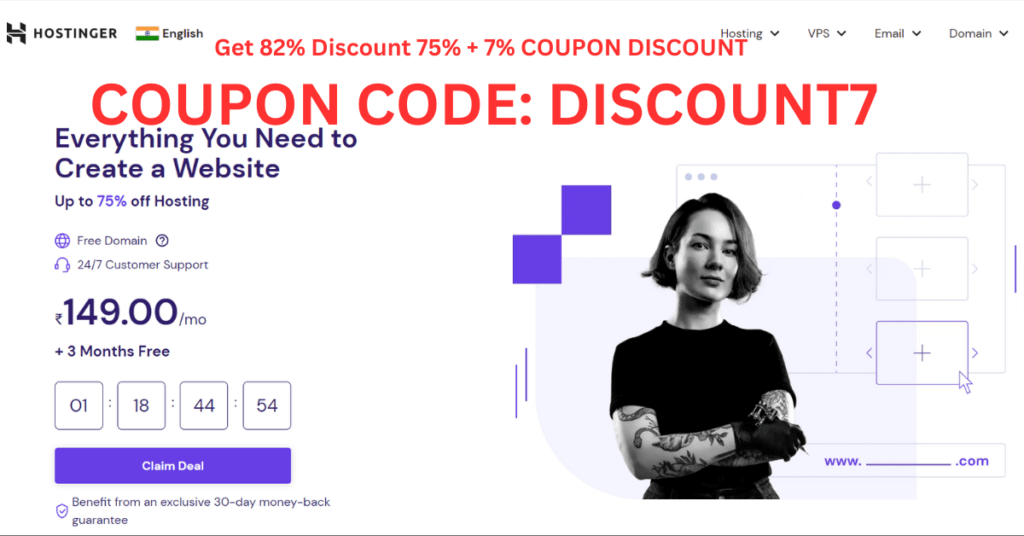
DISCOUNT COUPON CODE: DISCOUNT7
A Step-by-Step Guide on How to Purchase Web Hosting from Hostinger. Cheap and Best Web Hosting for all your Website Needs.
In today’s digital era, having a reliable web hosting provider is crucial for establishing a solid online presence. Hostinger is known for its top-quality hosting solutions, making it an excellent choice for your website. This blog post will guide you through the step-by-step procedure of purchasing web hosting from Hostinger. Get Extra Discount, Type DISCOUNT7 in the Discount Coupon Space
Step 1: Visit the Hostinger Website
To Buy Cheap and Best Web Hosting, Open your preferred web browser and go to the Hostinger website
You will be greeted with a user-friendly interface that showcases Hostinger’s hosting plans and features.
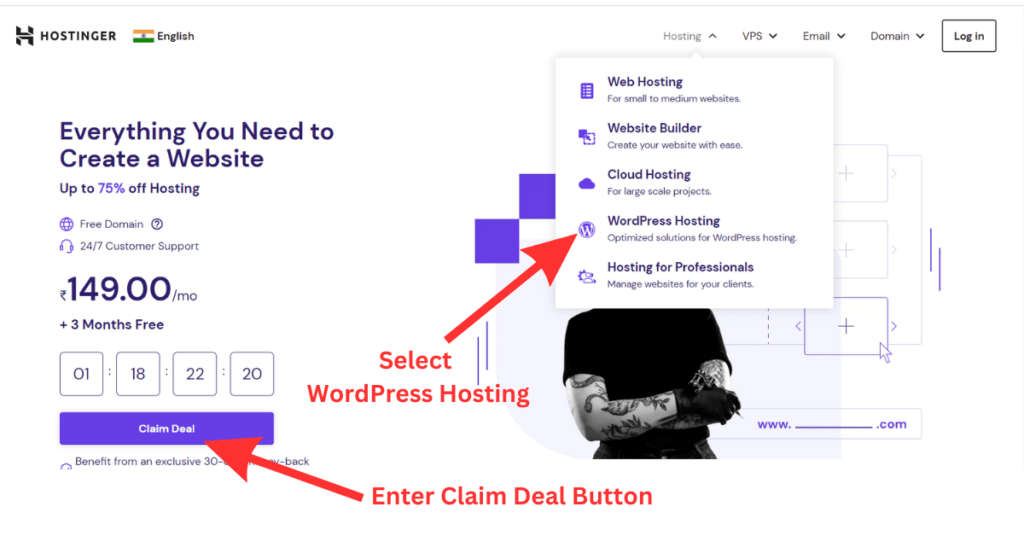
Step 2: Choose a Hosting Plan
In the Top Menu Bar Click Hosting to open a Dropdown Menu. Hostinger offers various hosting plans, including Shared Hosting, Cloud Hosting, VPS Hosting, and WordPress Hosting. All plans are very Economical. Hence, Hostinger is a Cheap and Best Web Hosting Provider.
Carefully evaluate your website requirements and select the plan that best suits your needs. Preferably Select WordPress Hosting.
Click on the “Claim Deal” or “Get Started” button to proceed.

Step 3: Select How Many Hosting You Want
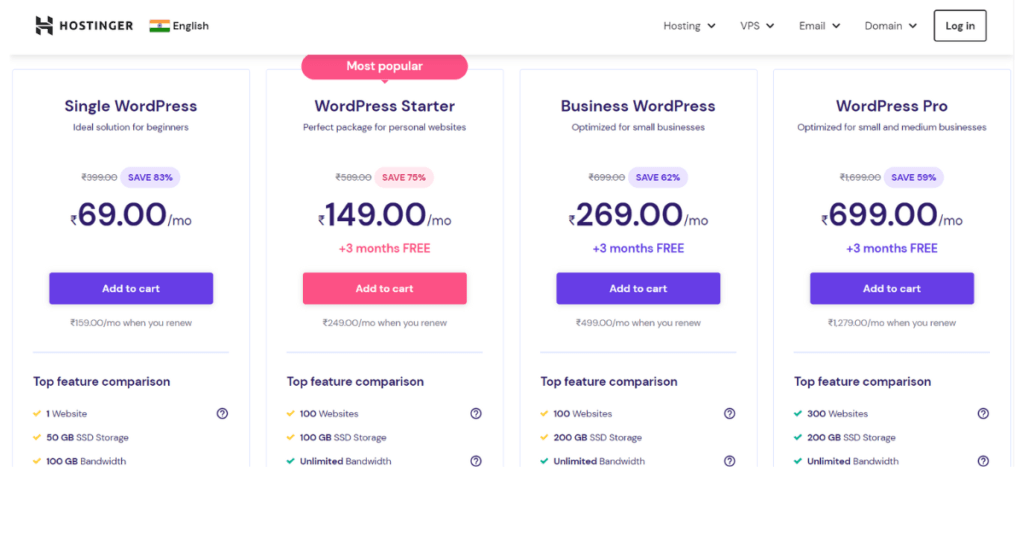
₹69/month Single WordPress Hosting:
If you want only Single Hosting, Select a Single Word Press Hosting Plan of ₹69/month. In this Plan you will not get a Free Domain, you have to purchase separately. But still it is Cheap and Best Web Hosting.
₹149/month 100 Web Hosting WordPress Starter Plan:
If you want more than 1 Hosting, select the Most Popular Plan WordPress Starter of ₹149/month. It provides 100 Hostings with 100 GB Total Storage Capacity.
₹269/month 100 Web Hosting Business WordPress Plan:
If you want more than 1 Hosting, select the Most Popular Plan WordPress Starter of ₹149/month. It provides 100 Hostings with 200 GB Total Storage Capacity.
₹669/month 300 Web Hosting WordPress Pro Plan:
You will get 300 Websites with 200 GB of Storage. This plan is most suitable for Large Businesses where Unlimited Traffic can visit the site and unlimited data can be stored and high-speed loading is required in the business.
Step 4: Let’s Select One Plan, for example, ₹149/month
Once you select ₹149/month Plan, you will get this page. On this Page, you have to select the Period of the Plan. You have a choice to choose the Period of 1 Month / 12 Months / 24 Months and 48 Months Plan. Many clients prefer this Cheap and Best Web Hosting plan.
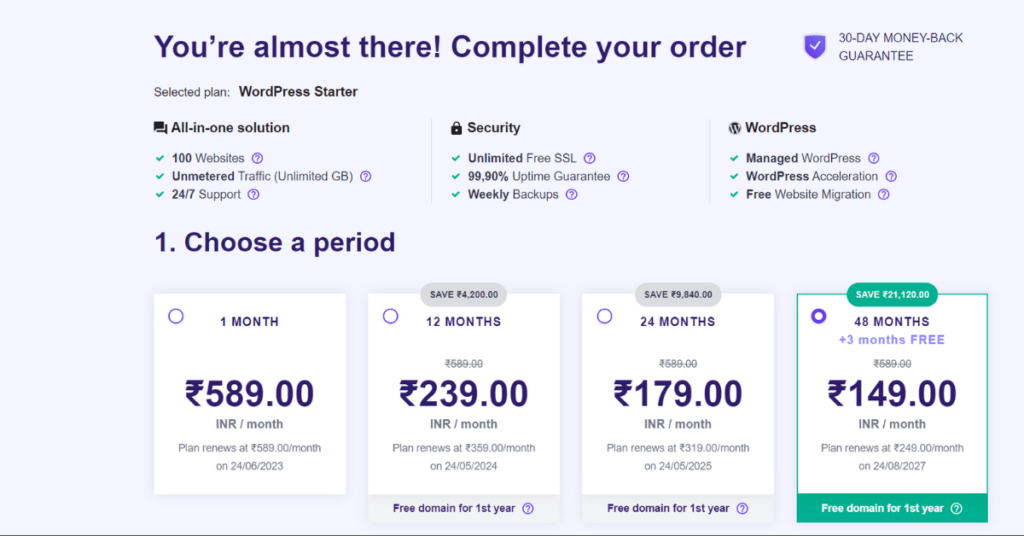
You can select any period but if you select a Higher Period of 48 months you will get the highest Discount.
Step 5: Fill Up Your Payment Details:
After filling up your Postal Address, Mail address, and Phone Number, you can select the type of Payment Method such as Credit Card/Debit Card, UPI, Paytm, Netbanking, GooglePay, Coingate, etc. At the bottom of the page, you will get a Discount Coupon Space, type DISCOUNT7, to get an Extra Discount.
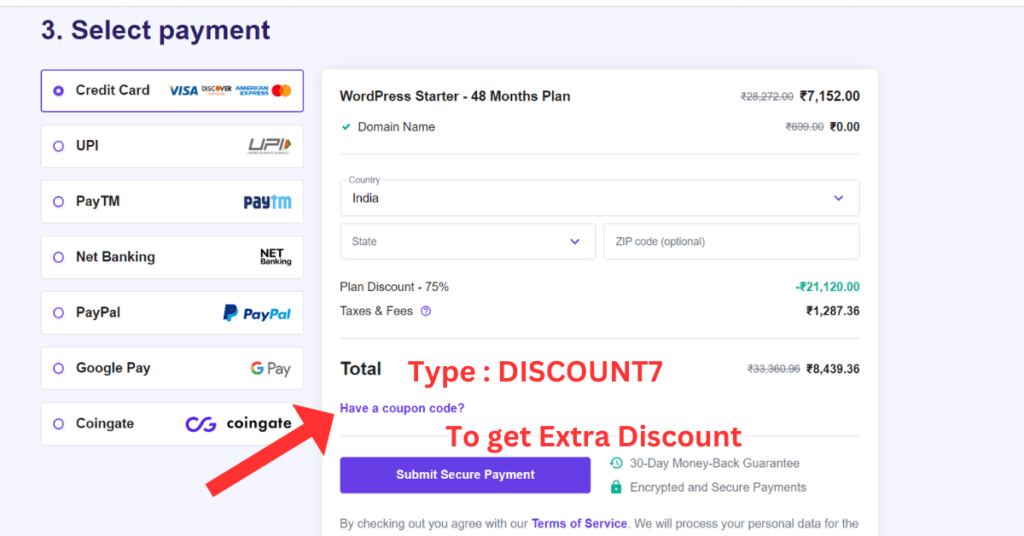
Double-check your selected hosting plan, domain, and hosting options in the order summary.
Ensure that everything is accurate before proceeding to the checkout.
Step 6: Create an Account
To complete the purchase, you need to create a Hostinger account.
Fill in the required details, including your name, email address, and password.
Review and agree to Hostinger’s terms of service and privacy policy.
Step 7: Make the Payment
Select your preferred payment method (Hostinger accepts various options like credit/debit cards, PayPal, and more).
Provide the necessary payment details and confirm your purchase of Cheap and Best Web Hosting and Enjoy Creating the Best Websites.
Step 8: Set Up Your Hosting Account
Once your payment is processed, you will receive a confirmation email from Hostinger.
Follow the instructions provided in the email to set up your hosting account.
You will receive information such as nameservers and login credentials to access your hosting control panel.
Step 9: Install and Customize Your Website
With your hosting account set up, you can now install a website builder or CMS (Content Management System) like WordPress.
Hostinger provides a simple one-click installer that makes the installation process effortless.
Customize your website by selecting a theme, adding content, and configuring necessary plugins.
Conclusion:
Purchasing web hosting from Hostinger is a straightforward process that ensures you have a reliable platform to build your online presence. Following the step-by-step guide in this blog post, you can seamlessly purchase web hosting from Hostinger and embark on creating your website with confidence. Remember to assess your website needs, choose the appropriate hosting plan, and configure any additional options to optimize your website’s performance. Hostinger’s reputation for quality hosting solutions makes it an excellent choice for individuals and businesses. If you would like to Buy E-Commerce Web Hosting, and if you are a beginner, then we recommend Shopify. You can upload 1,000 Products, connect with a payment gateway, etc. Read More.